Tutorial Series: Configuring Development Environments
Tutorial: How to configure Adobe Flash Professional CS5.5.
Introduction
In this series of tutorials we’re going to create template projects for three Integrated Development Environments (IDE) commonly used by ActionScript developers: Flash Professional, Flash Builder, and Flash Develop. We’ll target our templates for ActionScript development. This tutorial requires Adobe Flash CS5+ and Open Exhibits 2 (download the sdk ).
In this tutorial we’ll use Flash Professional CS5.5 to create a template project that we can use to create Open Exhibits applications using only ActionScript. You may also use Flash Professional CS5.0, though there might be some slight differences in the instruction.
Installation Folder
First, let’s open the Open Exhibits installation folder. Navigate to the user/OpenExhibits2 directory. There are several folders and files here:
apps folder – contains an example Open Exhibits application config folder – contains the licensing info lib folder – contains the Open Exhibits library files readme folder – contains getting started documents templates folder – contains getting started documents key.txt – contains your verification key
Creating a New Template Folder
Open up the installed template folder. You’ll see that Open Exhibits comes with a variety of templates. In this tutorial, we’ll go through the process of making our own template. We’ll print Hello World to the stage as a test.
First, we’ll create a new folder inside of the templates folder called: My Template. We’ll use this folder to store all the needed files that make up our project.
Next, let’s set up a couple of sub directories within this folder: src – stores the source code (ActionScript files) for the project bin – stores the binaries (swf files) and any other files that the application requests during run-time
Now that we have our project directory set up correctly, we can start setting up the project within the IDE.
Creating a Flash Professional Project
Let’s open up Flash Professional and create a new ActionScript 3.0 project: Create New -> ActionScript 3.0
Save the project file within the My Template folder we just created. We’ll give it the same name: My Template.fla
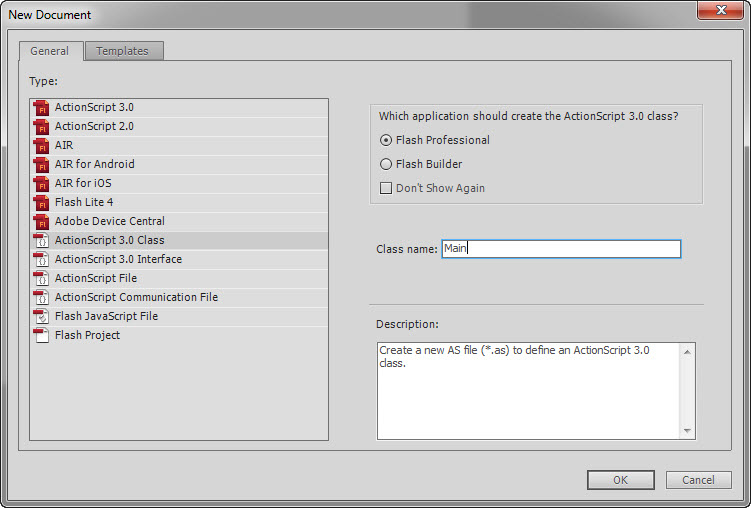
Next, we need to create a Main ActionScript source code file that we will use to make our initialization statements: File -> New -> ActionScript 3 Class
Fill in the the class name text field: Main
Save this document within our project’s src folder. The file name must be the same as the class name: Main
Next, we’re going to link the necessary files to our projects.
Linking Project Files
We can link the necessary project files through Flash Professional’s ActionScript Settings window: File -> ActionScript Settings
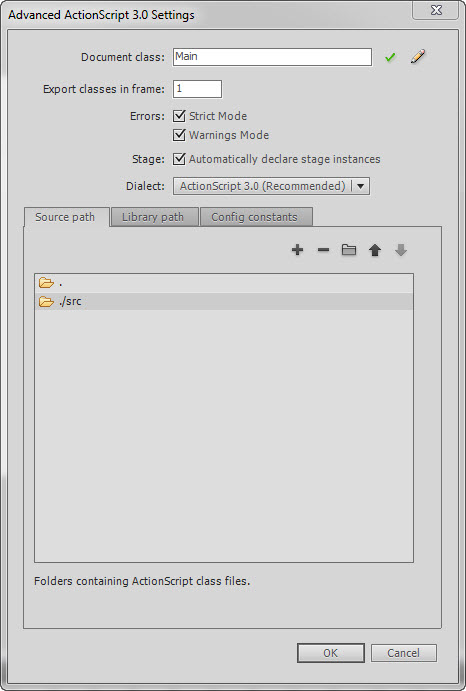
First, we’ll link the Main ActionScript file we just just created. Fill in the Document Class text field with the file we just made: Document Class: Main
We’ll tell Flash where to look for the file by add the src folder as a source path. Under the Source path tab click on the plus icon to add a new path. Type in: ./src
The dot represents the directory of the My Template.fla project file. The Source path tab should now look like this:
Next, we’ll link the Open Exhibits library files to our project. Click on the Library path tab and click the swc icon which is to the right of the minus icon. It will open a Browse to SWC file prompt. Navigate to the user/OpenExhibits2/lib directory and double-click on the GestureWorksGML.swc file. This library file contains the required classes and assets for all GestureWorks and Open Exhibits applications. Repeat these last steps to additionally include the GestureWorksCML.swc library file. This file contains the CML classes and assets. This library is not a requirement for GesureWorks and Open Exhibits applications. The Library path tab should now contain the library files:
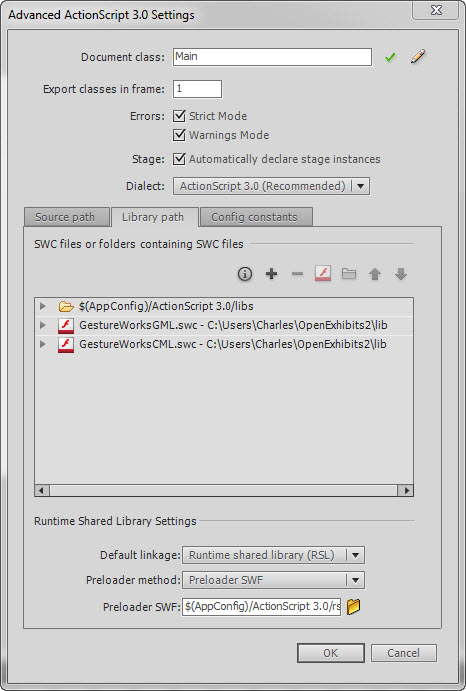
Notice the file path: C:UsersCharlesOpenExhibits2lib
The first thing to note is that Charles will be replaced by your own user name. The second thing is that this file is linked though an absolute path. We could alternatively use a relative path, but using an absolute path allows us to move our project folder without worrying about the location of the library files.
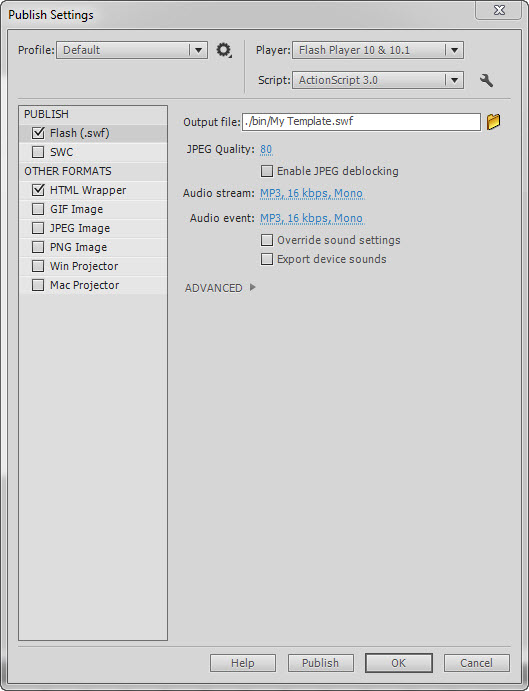
The last link we’ll make is to the bin folder. This is where the compiled swf files will be created. We can do this under Flash Professional’s Publish Settings: File -> Publish Settings
In the Output file text field, prepend the bin directory to swf file name: ./bin/My Template.swf
Setting Up the Main ActionScript Class
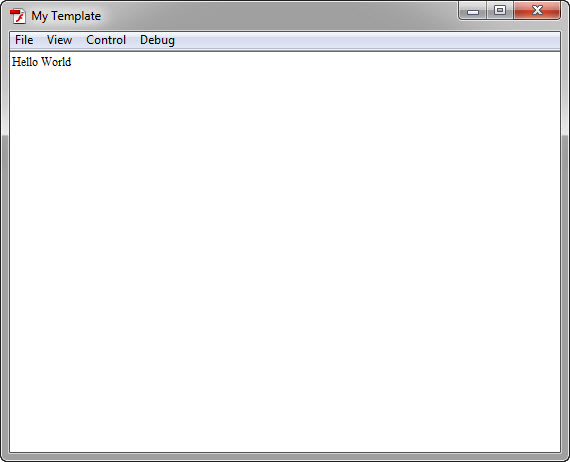
The last thing we’ll do is set up our Main ActionScript class. We’ll write a Hello World program just to verify that it’s compiling properly.
Open up the Main ActionScript file. Flash Professional will have already created some stub code. Replace it with the following:
2
3
4
5
6
7
8
9
10
11
12
13
14
15
16
17
18
19
20
{
import com.gestureworks.core.GestureWorks;
import flash.text.TextField;
public class Main extends GestureWorks
{
public function Main():void
{
super();
key = "VERFICATION KEY";
}
override protected function gestureworksInit():void
{
var txt:TextField = new TextField;
txt.text ="Hello World";
addChild(txt);
}
}
}
Let’s look at the import statements one at a time:
This a mandatory class for every Open Exhibits application.
The easiest way instantiate it is to to extend your Main ActionScript class:
The other import statement:
..allows us to create a text display object, which we use to print our Hello World message to the stage.
Our class has two methods: the constructor (Main) and the initialization callback (gestureworksInit). Let’s look at the constructor:
The other import statement:
8
9
10
11
{
super()
key = "VERFICATION KEY";
}
First, it calls the superclasses’ constructor:
Then, it provides the Open Exhibits license verification key:
Your must replace the string VERFICATION KEY with your own key. During installation, a verification key was created and stored in the installation directory within the file key.txt. If you have problems with your verification key contact us: [email protected]
Now let’s look at the initialization callback:
14
15
16
17
18
{
var txt:TextField = new TextField;
txt.text ="Hello World";
addChild(txt);
}
gestureworksInit() is an abstract protected method of the GestureWorks class. An abstract method is one that is meant to be overridden by a subclass. This allows us to provide our own custom code for this method. It is called by the GestureWorks class when all the necessary files have been loaded and processed. This as our entry point into writing applications.
Let’s run the program and see if everything went well: Control -> Test Movie -> Test