Kinect Enabled Gigapixel Viewer Part 3: Physically Using the Kinect
The Kinect is unique and extremely hygienic in the fact that it allows a user to manipulate digital items without touching anything, though arguably the part that most people enjoy more involves the part that makes them feel like they have telekinesis. This tutorial has focused on setting up the Kinect enabled Gigapixel viewer. Part 1 focused primarily on software setup and some physical space setup, Part 2 focused on using Microsoft Deep Zoom Composer to turn a high-res image into your own gigapixel image, and this section will focus on the physical setup and operation of the Kinect so you know what to expect.
There’s one very important thing I want to stress about setting up the Kinect: put it on the edge of your desk/table/shelf/whatever you have it resting on.
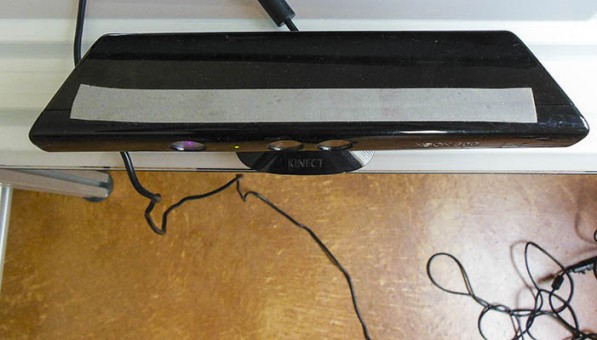
The reason for this is you want an accurate depth picture, and you don’t want the infrared beams and sensor cut off by a huge chunk of desk in the bottom of its field of view.
The Kinect works by broadcasting what’s basically an infrared checker pattern. The placement of its sensors helps to interpret the depth, as well as the way the checker pattern warps around curved surfaces, such as a person’s body. The TUIO Kinect Complete package hooks you up with a blob tracker, which looks for significant blobs and translates them into touch points in the OpenExhibits Framework. This means you can use these touch points to track drags, touches, pinches and zooms.
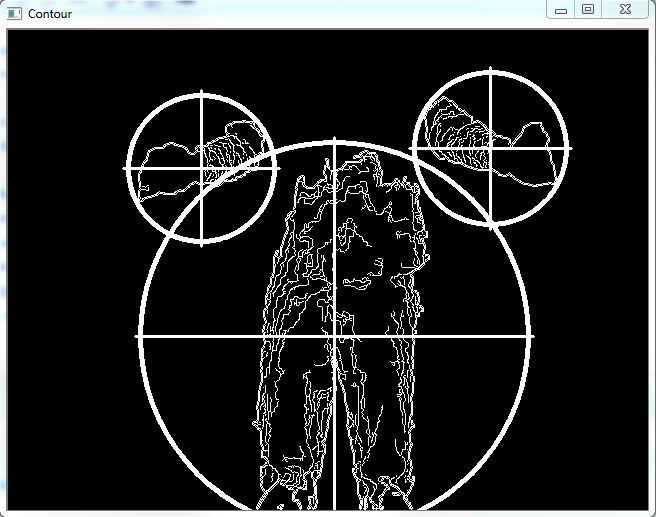
The TUIO Kinect Complete Contour software comes already set up, you shouldn’t have to worry about adjusting or calibrating your depth, though you will probably need to experience for yourself when it starts to really track your body parts. As the TUIO Kinect Complete uses a blob tracker and not a skeletal tracker, any part of your body can become a touch point at the right distances.
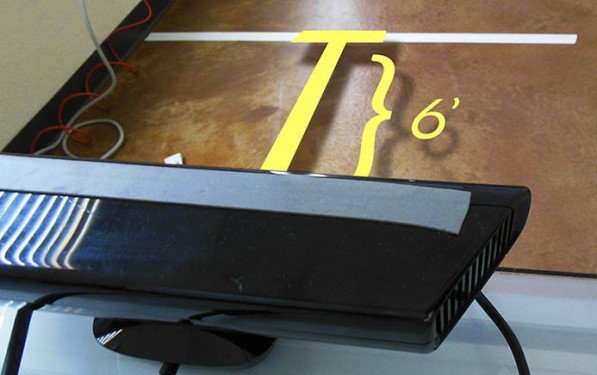
For our setup here at Ideum, the ideal threshold is about six feet away. This means once a person reaches their hand within six feet, the Kinect starts registering it as a touch point. This is something to keep in mind when preparing your Kinect, it’s nice to give a marker of some sort to note where this threshold of interaction is.
The next thing to remember is a user’s hands, or body parts (I’m not saying you should try to control a gigapixel image with your pelvis, but if if it “somehow happens”, you probably should put a video up on the internet and link it here so we know what was going on) are being tracked as touch points. This means you primarily want to imagine one-point-drag, two points to pinch and zoom.
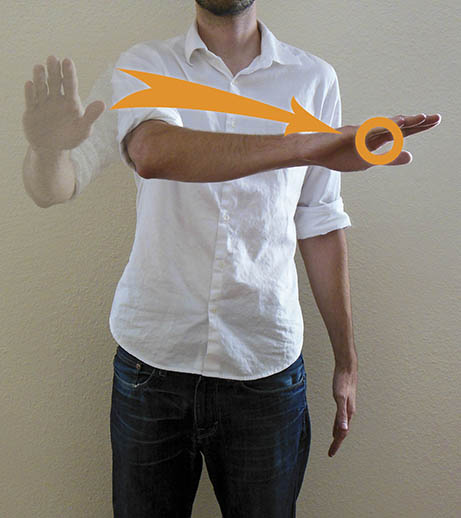
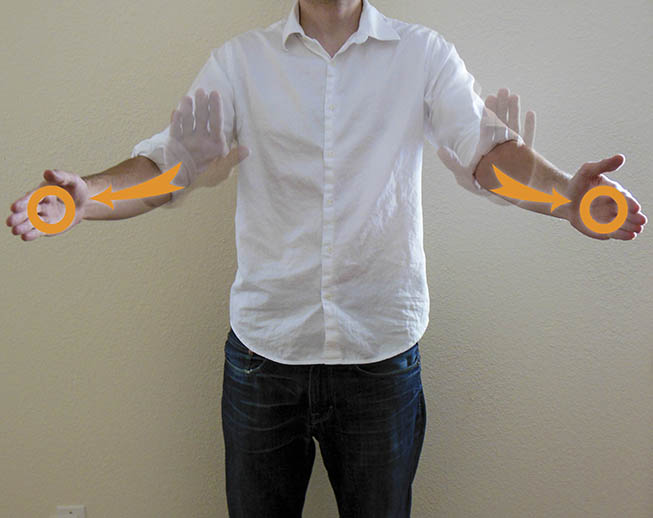
- Pan, or “This is not the part of the image I’m looking for.”
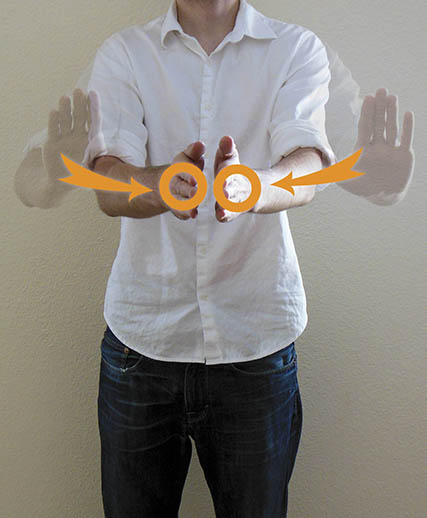
- Pinch (expand) Note: the arms are already forward at the start
- Zoom (made by spreading two points apart)
You will also want to pay attention to your threshold of interaction. It’s better to push your hand(s) in, manipulate the image, and pull them back out of range, reset your hands, and repeat. This gives you swimming and paddling motions to zoom in, or pan across. If you find the viewer becoming unresponsive, try dropping your hands down to clear your touch points, then reach back up.
And that’s the end of this three-part tutorial session on how to manipulate the Gigapixel Viewer using what appears to everyone else to be Jedi mind tricks. Hopefully you’ve been able to get your Kinect set up, installed, and working with the Kinect Gigapixel Viewer, as well as make your own branched, gigapixel images. Or at least you know how to go about making your own gigapixel images even if you don’t have any you need to make.
by Joshua Hicks ![]() on September 28, 2012
on September 28, 2012